I’m unsure if its just me, or other people are having the same issue of Onedrive for Business not ‘provisioning’ until around 3 minutes after first logon. I tried it with and without the system apps on W10-1809 and it didn’t seem to make much difference, onedrive would take around 3-4 minutes to install (per user) on first logon. Subsequent logons are fine, its just the very first logon that seems to take an age.
There doesn’t seem to be any indication that Onedrive is actually doing anything to the end user, and the ‘onedrive’ folder in Explorer displays, but doesn’t contain any files. This can be a big pain in schools, especially with shared workstations.
Once Onedrive installs, the icon was greyed out (offline), users would have to manually Right Click > Settings > Account > Add Account before their files would sync.
I haven’t yet found a way to speed up this process, so instead I’ve put together a small batch script that will do the following;
First Check if the setup had already run before, if so terminate
- Check to see if Onedrive.exe exists, if not keep checking
- Once provisioned, wait 12 seconds to ensure its fully provisioned
- Run first time setup (OneDriveSetup.exe)
- Enable Modern Authentication
- Open Onedrive Folder (Onedrive.exe)
- Create ‘Completion’ file for step 1 to check against
The Foundations
In order for this to work i will assume you already have Azure SSO setup, (I was in the process of writing an article but got sidetracked, i’ll update the article here once i get a minute) and that you have a valid O365 subscription.
You will need to enable the following GPO’s.
Computer Config > Policies > Admin Templates > Onedrive > Silently configure OneDrive using the primary Windows account – Enabled
Computer Config > Policies > Admin Templates > Onedrive > Enable Onedrive Files-On-Demand (Okay not needed but why wouldnt you?)
Running the Script
The Batch script can be run manually but makes sense to add this as a logon script. The script can be downloaded or copied from Pastebin below. At the end of the script it will create a blank file in their %USERPROFILE% folder and check against it to ensure it doesn’t run again.
GUI Version
If like me you don’t like the idea of a batch window being open on the users screen for a few mins while Onedrive installs, this may be the best option for you. I have written a small program in VB which will call the .Bat file silently and provide a progress bar to the end user so at least they see “something” happening.
Before we continue, i must stress this probably wont be the best way to do it, there may be even easier options out there but its a quick fix to a problem i had, it works for me, if it also helps you then great. The code probably could be tidied up a little but as i said, its a quick fix and it works.
I have used Visual Basic 2010 express, purely because i’ve had it for years and i understand it a bit more than other languages.
You can download here > https://visualstudio.microsoft.com/vs/older-downloads/ (you might need to create a free account).
The program will run in 3 parts (as exe’s), and display a progress-bar which is triggered by certain parts of the batch script. ( I didn’t have the time or knowledge to convert the batch commands into VB commands so i opted for this option).
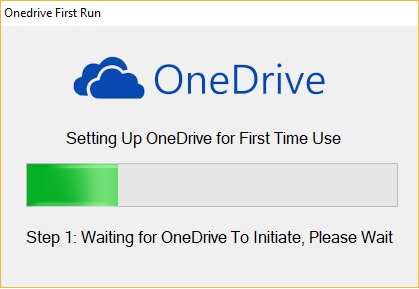
The process works like this
- Run the first program at logon (ODL.exe)
- The program checks to see if the ‘completion file’ exists, if so it terminates, if not it runs the batch script
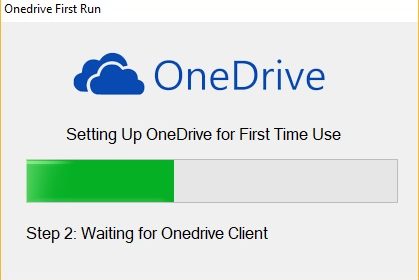
- The script runs in the background, when Onedrive has provisioned, it launches the second part (ODL2.exe) and terminates the first window.
- Progress bar increments to 80% while the script continues to run in the background
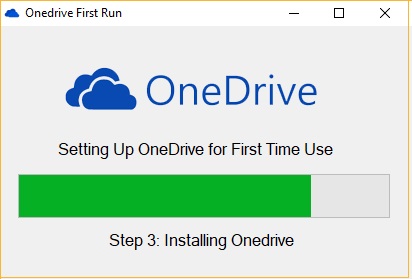
- Once script is complete, the progress box closes and displays a message from the third part ODL3.exe to alert the user that one-drive is fully set up.
The Setup
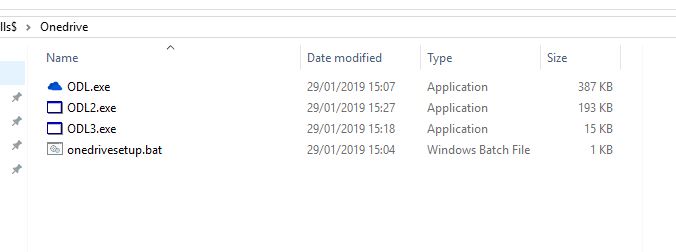
I will provide all the source files below needed to edit this program, it is all set up, the only section you need to change is the directory to which thesetup files will be stored (the .EXE’s & batch script) which i will show you below. To start you need to create a directory which is accessible to your users, for example \\Appsserver\files$\onedrive. In here you will store your batch file and your .EXE files which i will explain how to create below.
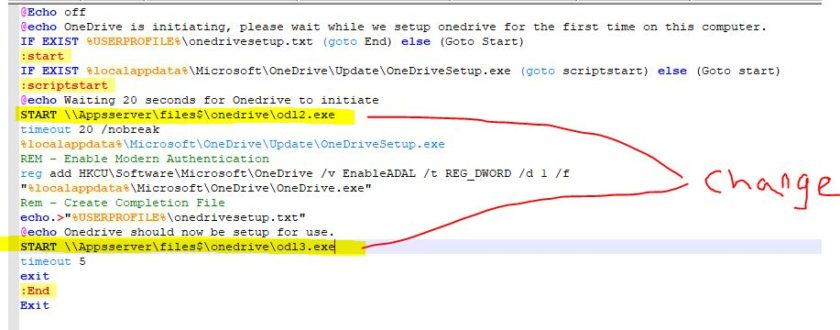
The Batch File
This is slightly different to the one posted further up, the only difference is the code to call the .EXE file. You will need to edit this to your preferred storage location e.g \\Appsserver\files$\onedrive And place in the directory you created above
The GUI (.EXE files)
To create the 3 .EXE files shown above you will first need to change the location of your batch file & compile your program for it to work. I will provide you with the compiled ODL2.exe and ODL3.exe files as they do not require any modification, but you’ll probably want to comile it yourself so you can be sure of the codes integrity and see exactly what the code is doing.
You do not need to make any other changes but the source code is there if you want to make any improvements or changes.
The first step is to install Visual Basic 2010 express as detailed earlier in the article and run it for the first time.
Now you should download the source files from here > https://1drv.ms/f/s!AvfwzsD1BOdohg3kYrv0vJ7dsDH7
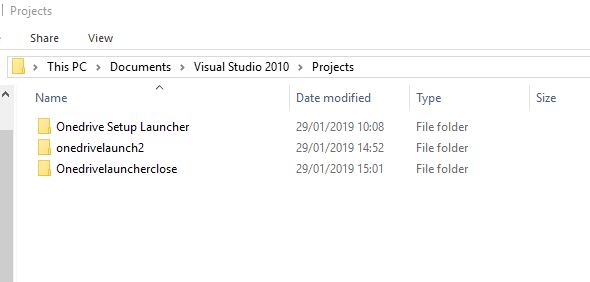
Place the 3 files into the ‘Projects’ folder located at Local User > Documents > Visual basic 2010 > Projects
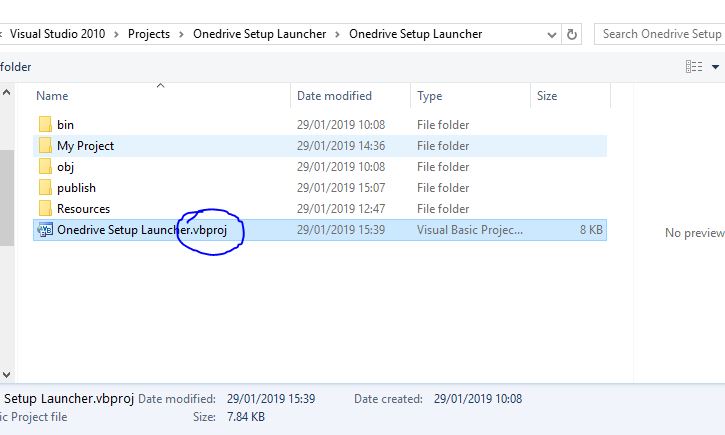
Open up Visual Basic 2010 and click ‘open project’ & browse to local user\Documents\Visual Studio 2010\Projects\Onedrive Setup Launcher\Onedrive Setup Launcher, Choose the onedrive setup launcher.vbproj file
On the right hand pane in ‘Solution explorer’, right click ‘Form1.vb’ and chose View Code
The code viewer will appear, you can now change your location of your batch file
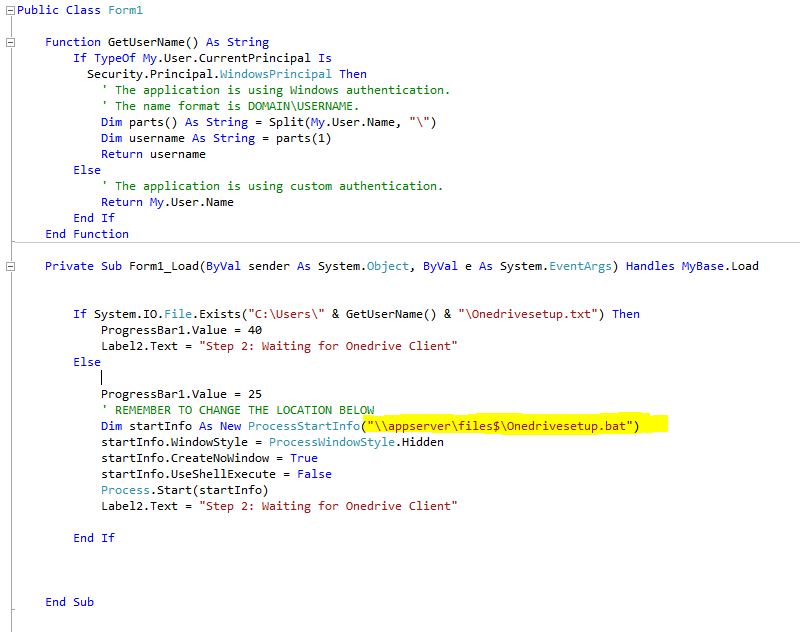
Change to location to suit you and go to File > Save all
You can now press the green play icon or press F5 to start debugging.
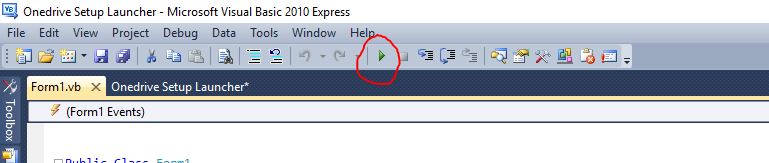
The program will run, and try to run the batch file at the specified location. Once you are happy you can grab the updated .EXE file from Documents\Visual Studio 2010\Projects\Onedrive Setup Launcher\Onedrive Setup Launcher\bin\Debug
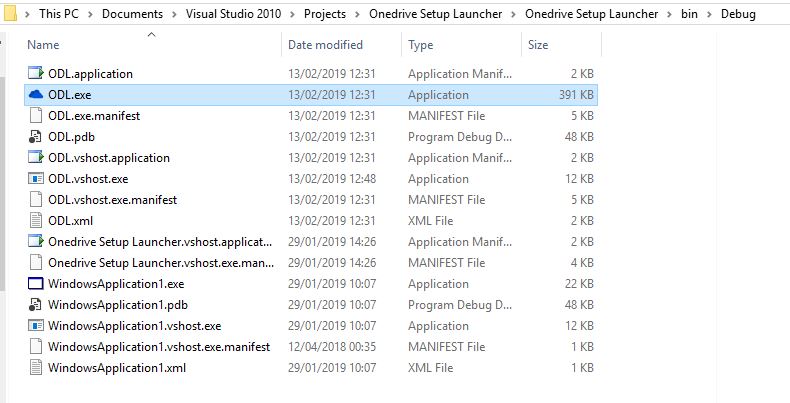
Copy this to your directory you created in Step one (e.g \\Appsserver\files$\onedrive).
You can either use the ODL2.exe and ODL3.exe i have provided in the zip file, or repeat the above steps for the remaining two folders in order to generate your own .EXE files, these don’t need any modification to any of the code.
Note: It is important to update your batch file with the correct path to the .EXE files, and ensure they are in the location.
You can run ODL.exe at logon using the following GPO
Computer Config > Admin Templates > System/Logon > Run these programs at Logon

#EdTech Network Manager, experienced in Microsoft 365, Server 2019, Intune, SCCM and anything inbetween.