If you are in the process of deploying Windows 11 to your organisation, you may be looking to customise your deployment by modifying the Windows Image File before adding it to your chosen OSD tool (like SCCM or MDT).
In this tutorial i will explain how you can use my new tool WIMSimple to remove built in Windows 11 apps, remove unwanted OS’s from the WIM and inject drivers directly into the WIM.
Downloading the Script
You can download the script manually from Github by clicking here or install from the PowerShell Gallery using the following command
Install-Script -Name WimsimpleIf this is your first time using the PowerShell gallery you may need to trust the location first.

Running The Script
Manual Install
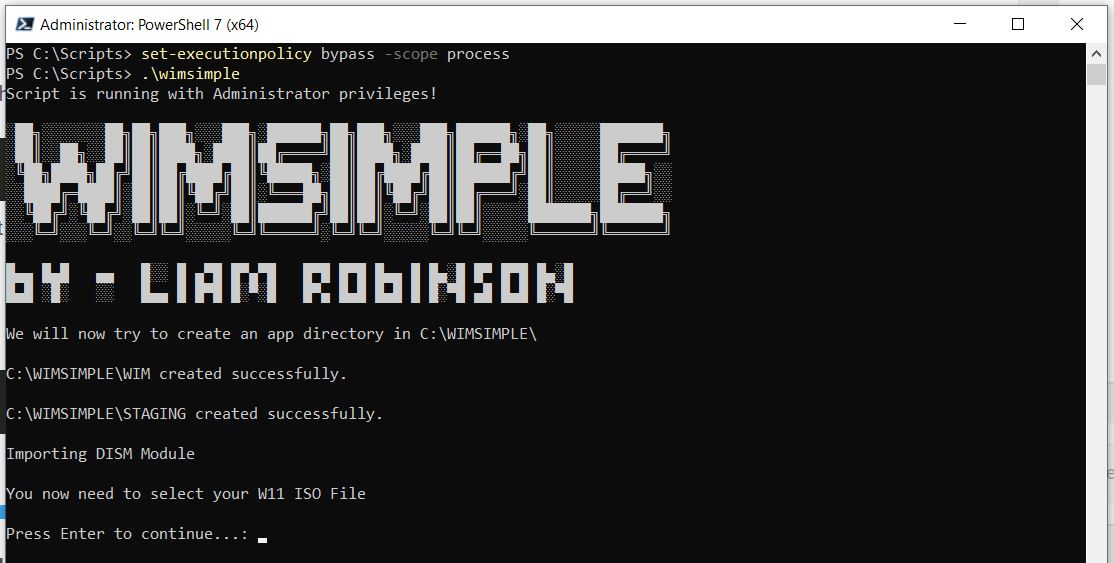
Open up an elevated PowerShell window and enter the following cmdlet
set-executionpolicy bypass -scope processThis changes the execution policy to allow the script to run, for security in mind, this will only change the policy for this session (to stop other scripts being able to execute without permission)
Call the script by running
.\wimsimple.ps1PowerShell Gallery Install
If installed from the PowerShell Gallery, simply type
wimsimpleInto the PowerShell Window
UPDATE FEBRUARY 2026 – WIMSimple v2 contains a new GUI mode. If you wish to use the CLI, Choose Option 2. For the GUI choose option 1 and follow these instructions
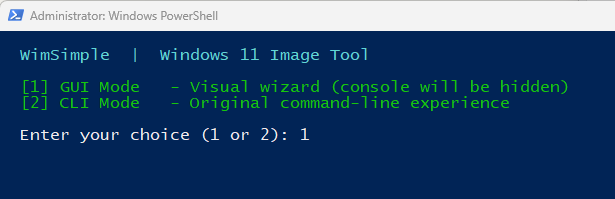
If you choose CLI Mode, This will launch the script and begin to create the required directories at C:\WIMSIMPLE
Select an ISO
You should now select your Windows 11 ISO file, you can get this from VLSC (Microsoft 365 Admin Centre > Billing > Your Products) or Download directly from Microsoft (Remember to choose English International for EN-GB)
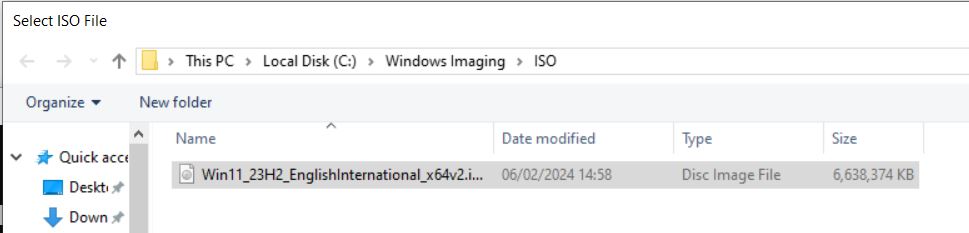
Once selected, the script will start to mount the ISO and extract the install.wim to the C:\WIMSIMPLE\WIM folder.

Choose an Index
Once completed, the script will analyse the indexes on the image and ask you to select one to work with.
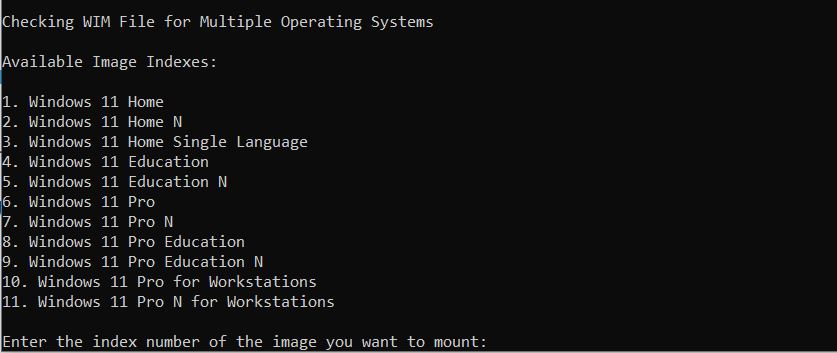
Select your index by inputting the corresponding number and pressing Enter.
It will now check if there’s already an existing image mounted to the staging folder (in case a previous attempt fails), if so it will remove it.
Remove Other Indexes
You will now be asked if you’d like to reduce the overall WIM size by removing the other indexes, choose Y/N based on your requirements.
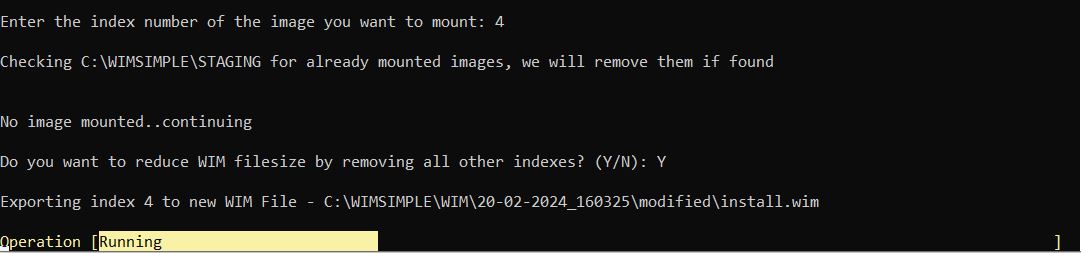
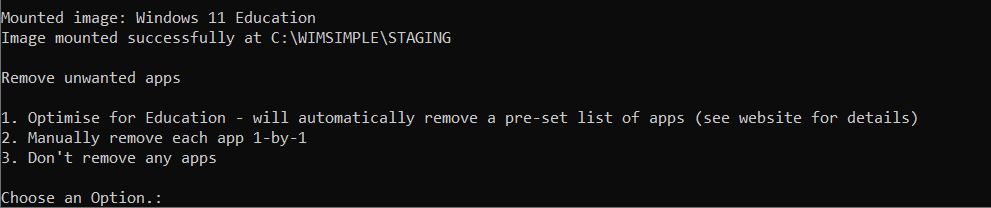
The script will now mount the image file to the C:\WIMSIMPLE\STAGING directory

Remove Built-in Apps
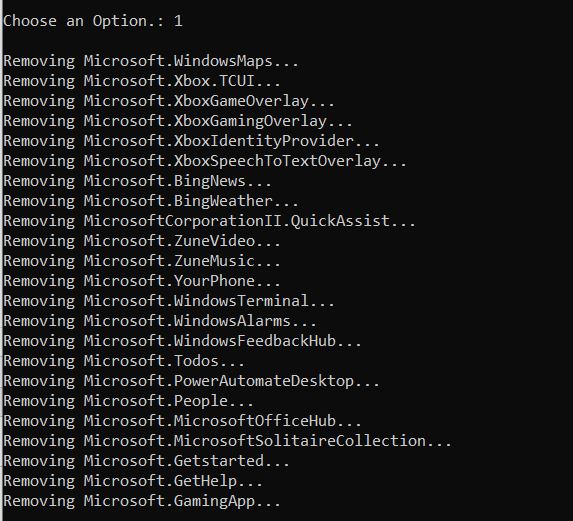
You’ll now be given an option to remove apps. Either 1. Optimise for Edu, 2. Manually Remove or 3. Don’t remove.
I prefer to choose #1 as most unwanted apps will automatically be removed.
After the apps are removed, you’ll be given a list of apps still on the WIM file.
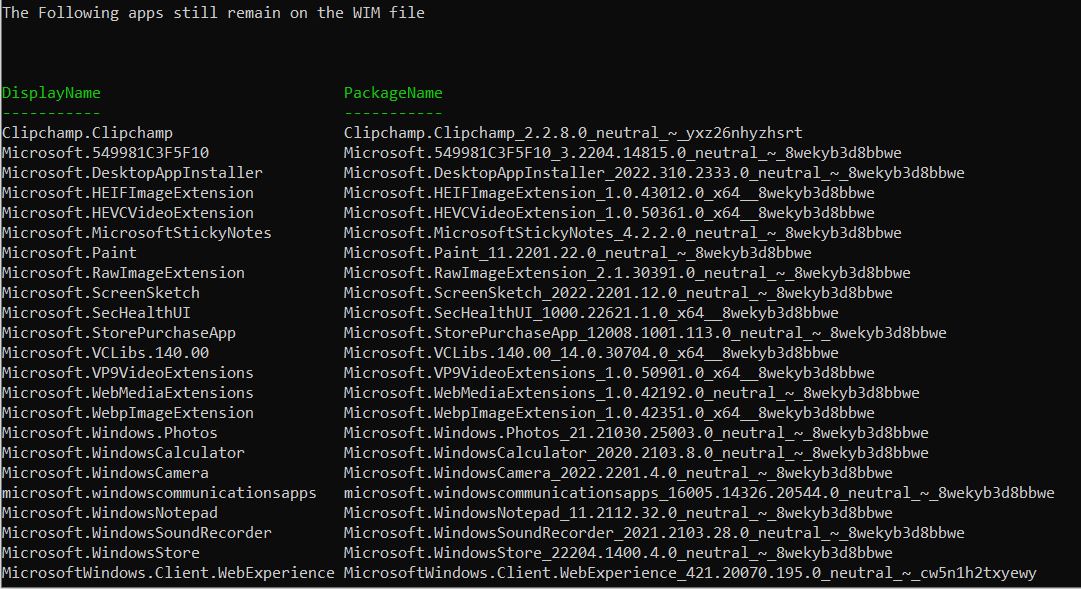
If there are still apps here you’d like to remove, you can do so by entering 1. To remove more apps or 2. to continue without removing apps.

Inject Drivers
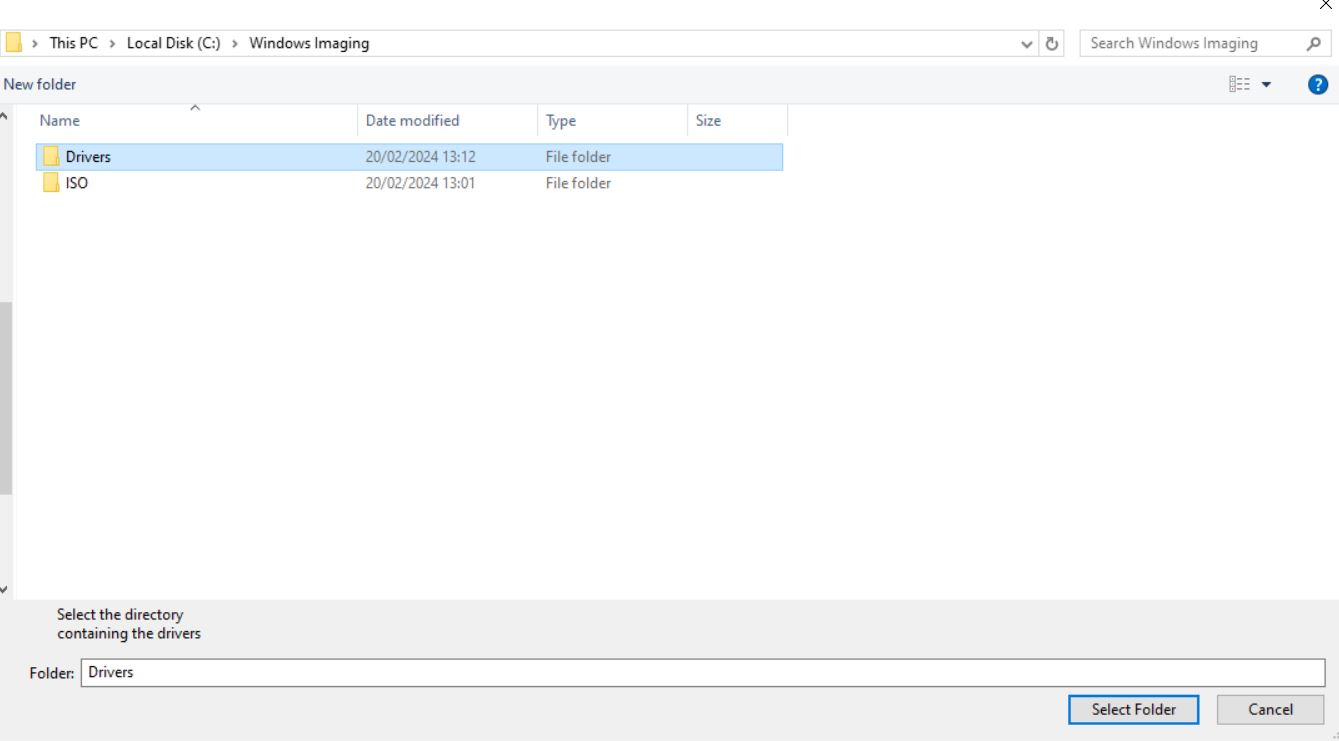
You now have the choice to inject drivers into the image. To do this you’ll need to have the drivers ready, its best practice to get the enterprise driver packs from the vendor which usually contain all drivers in structured format.

Type 1 and press enter. You’ll now want to select the folder containing the driver structure.
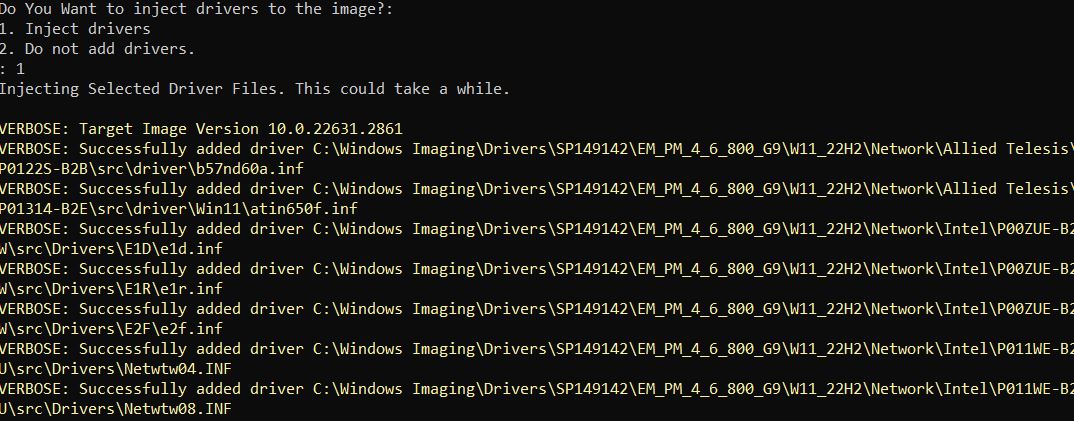
The script will now check the folder and inject any drivers into the WIM file. (Note: this could take a while depending on the number of drivers)
Unmount Image
When the drivers have finished, the script will attempt to unmount and compile the WIM file with your removed apps and added drivers. This could take a while.

Once finished you’ll be given the path to your completed WIM file.

If you chose to remove the other indexes, the old WIM will remain untouched, the new one will be in the ‘Modified’ folder and only contain 1 index.
Please bear that in mind then using SCCM or MDT to deploy the image.
WIMSimple v2 – GUI Instructions
In Version 2 of WIMSimple, I have included a simple GUI to help streamline the process and also added an option to create an .ISO file with the customised .WIM for easy deployment via USB.
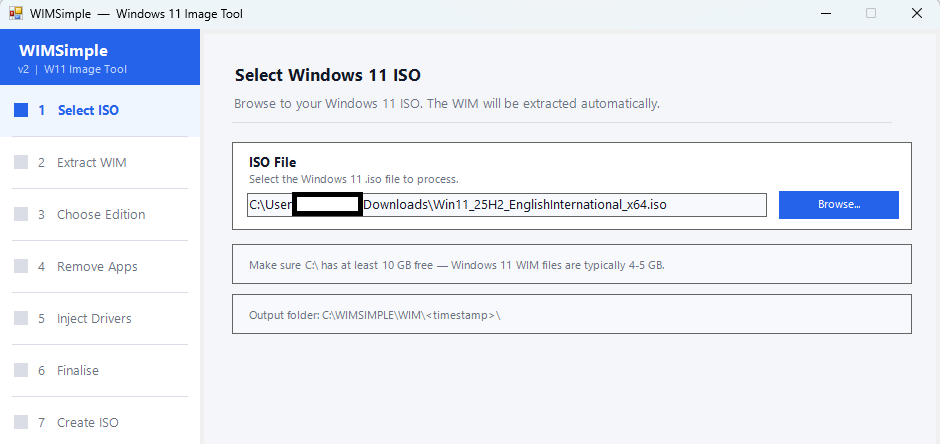
Launch WIMSimple and select the GUI mode.
Select your ISO File
Click Next.
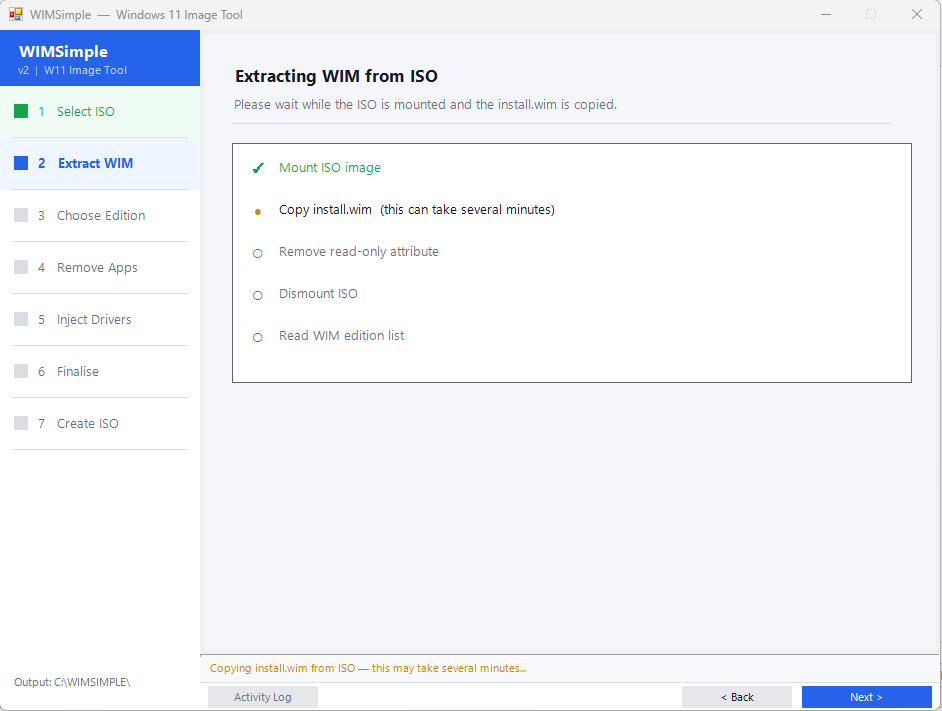
The WIM file will be extracted from the ISO.
Click Next.
Select your preferred edition and remove other editions if required.

The new WIM will be created and mounted using DISM. This may take a while and the application may appear unresponsive during this time.

Select which apps you wish to remove from the Image. The preset is set to apps likely to be removed by Education admins but you can tweak this as you see fit.
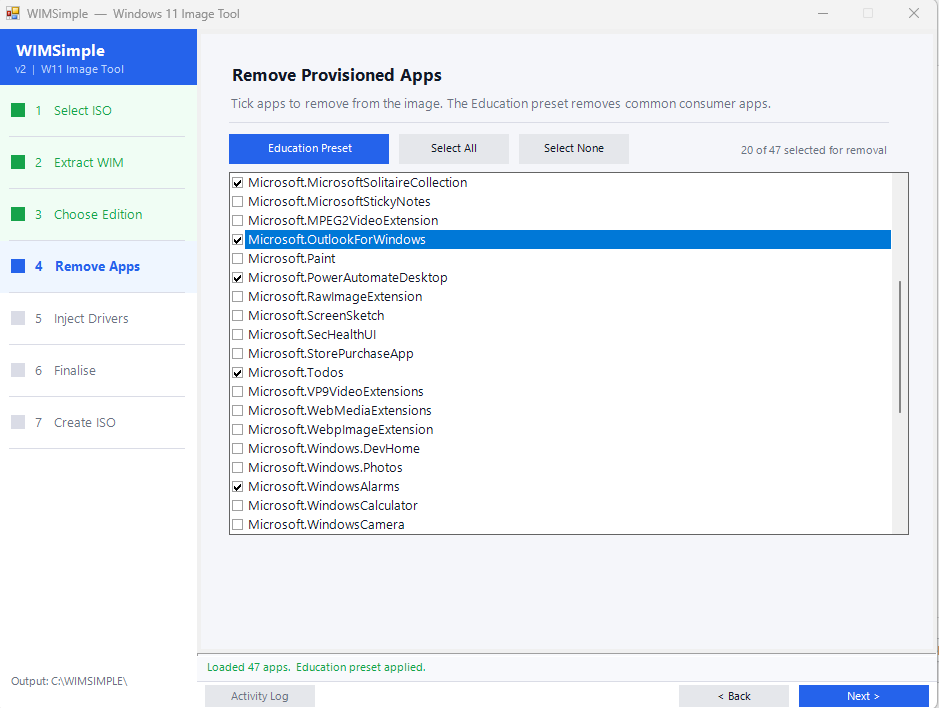
The apps will now be removed.

You can now choose to Inject Drivers into your image (Network, Printer Drivers etc)

The .WIM will now be saved, this can take a while depending on your system (DISM is slow!)
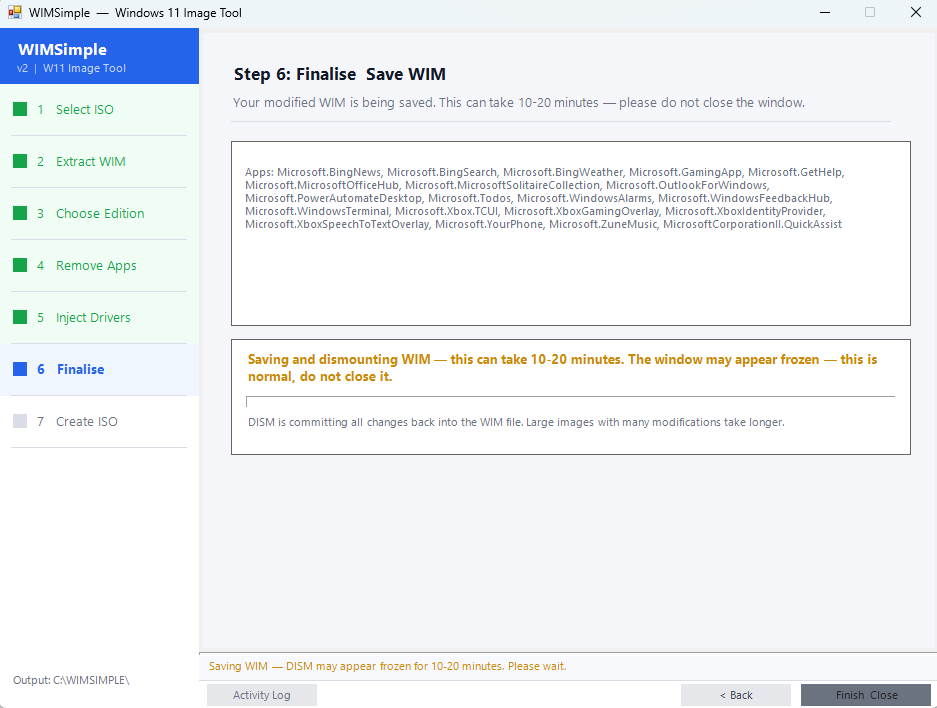
The modified WIM file is now complete in the C:\WIMSIMPLE\WIM Folder. You can either use this for deployment with MDT/SCCM or create a ISO file on the next step.

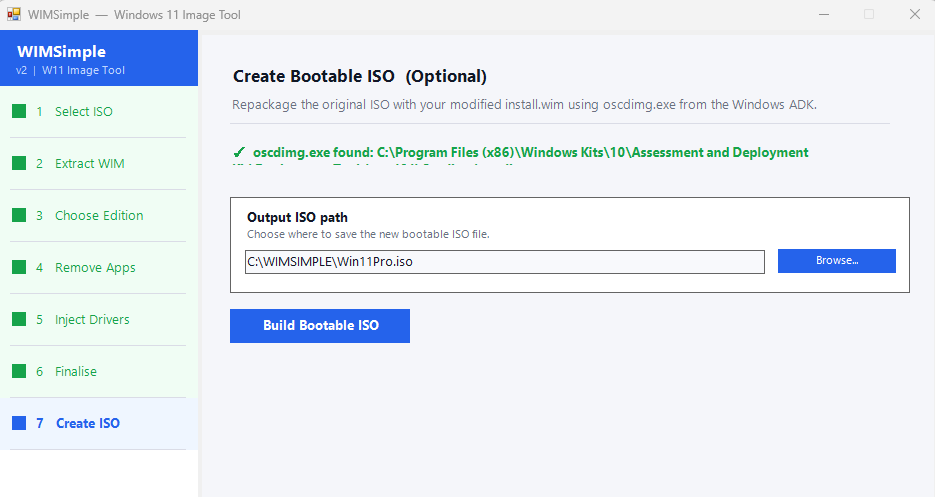
To create the ISO you will need Windows ADK Installed before continuing.
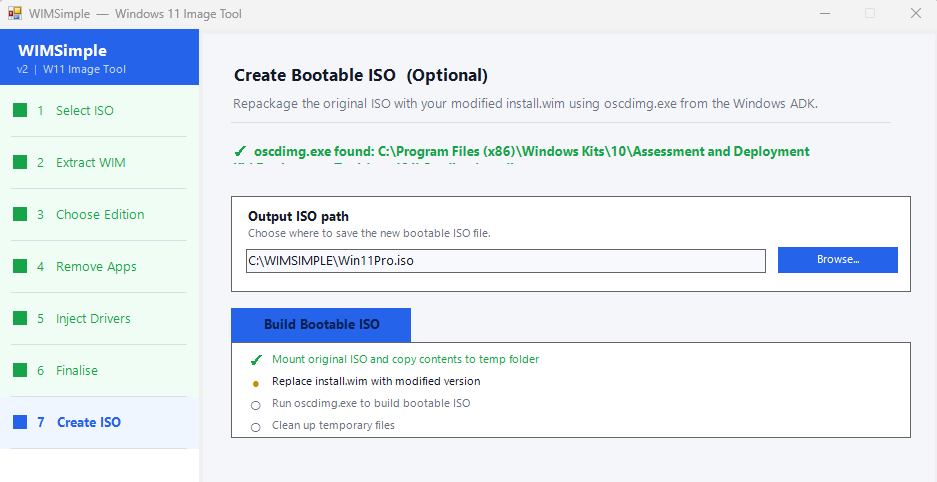
Select your save location/filename or leave it set to default. Click Build Bootable ISO
The ISO file will now be created.
Once Complete you can use tools like RUFUS to create a USB from the ISO for deployment.


#EdTech Network Manager, experienced in Microsoft 365, Server 2019, Intune, SCCM and anything inbetween.
Hi ,
I have managed to get the wim file which I have done as follow instruction which you provided .. now I have question.. Can wim file boot from USB when installing Windows onto laptop?
Please do let me know.
Kind regards
Bhav
Hi Bav, not really sure i’m afraid as i’ve never tried it. You may be able to replace the default install.wim from your USB with your modified one though. Please let me know if you try it.
Hi Liam,
I just wanted to say that I tried replacing the install.wim file with the newly curated one, and booting from USB but it didnt work. It could have been user error as I haven’t done anything like this before, but I beleive that this just isn’t a solution if using a USB. It was a great experience for me to run the script to make the modifications though. Thank you
Thanks Danielle. At a quick search it looks like it is possible but required to change to the WIM to .ESD. Id recommend deploying a custom image via SCCM or MDT if you need to, or do away with them entirely and use Autopilot using my guide here > https://liam-robinson.co.uk/how-to-deploy-windows-11-using-intune-autopilot-full-guide/