Microsoft’s Managed Home Screen, a feature of Intune, is a powerful tool for configuring dedicated and multi-app kiosk devices. Whether you’re deploying devices for education or enterprise environments, enabling sign-in capabilities can enhance the user experience while ensuring compliance with your organisational policies.
In this article I’ll show you the essentials of setting up Managed Home Screen sign-in for Android tablets, allowing your users to pass SSO to other Microsoft apps.
Prerequisites
- Intune Enrolment:
- The Android tablets must be enrolled in Microsoft Intune as Corporate-owned dedicated device with Microsoft Entra ID shared mode.
- Managed Home Screen Installed:
- The Managed Home Screen app is deployed via Intune to your device(s).
- Azure Active Directory (Azure AD):
- Azure AD accounts are required for user sign-ins
If you have not yet enrolled your tablets into Intune and installed the MHS app, follow my comprehensive guide here: How to enrol and manage Android “shared-devices” in Microsoft Intune
1. Configure Managed Home Screen Sign-in
In the Intune admin centre Go to Devices > Android > Configuration Profiles and create or edit a configuration profile.
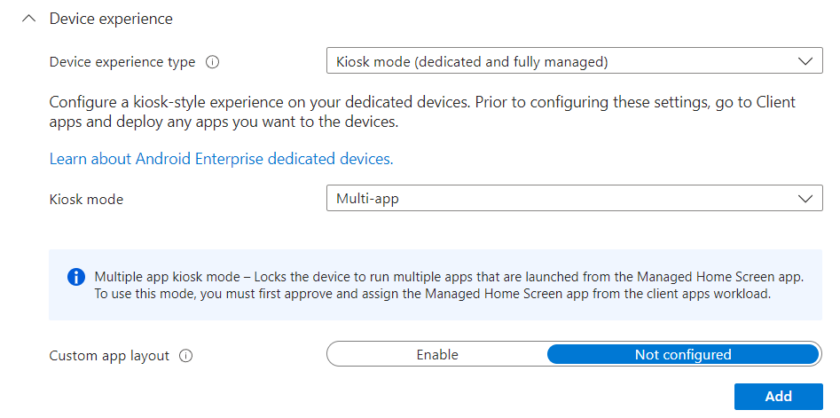
- Under Device Experience, enable Kiosk Mode and Multi-App
Add any apps you wish to appear on the Managed Home Screen (note: if you do not add any the users will just see a blank page)
- Under Device Experience > Dedicated devices, enable MHS Sign-in Screen.
Basic Customisation
Below this you can also set a custom wallpaper and screensaver to add branding or assist users with sign-in prompts.
To add a screensaver to MHS, simply configure the screensaver fields further up under Device experience.
Session Pin & Timeout Settings
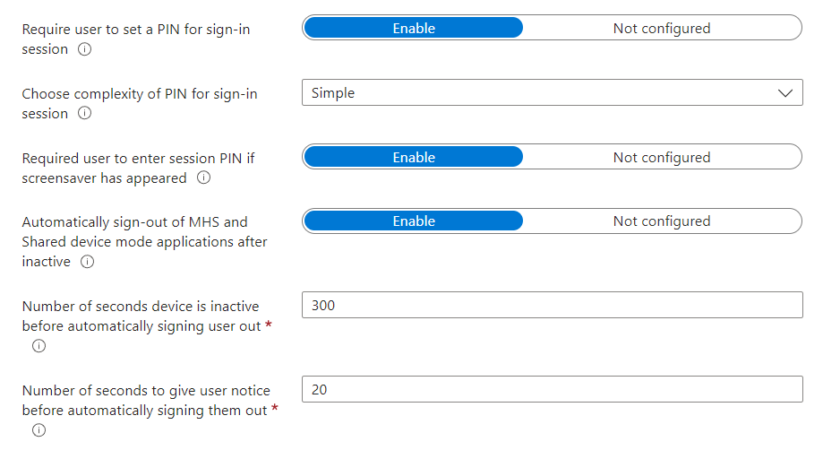
Here you can configure requiring a session pin after sign in. This is handy for student devices who may use the tablets intermittently during the lesson. By setting a session specific pin Users can easily sign in and out without having to enter their password each time once the device has gone to screensaver or into standby mode.
You can also enable automatic sign-out after X amount of seconds by adjusting the settings above.
Deploy Configuration Profile
Now the basics are complete, deploy your configuration profile to a group containing your devices.
2. Advanced MHS Customisation
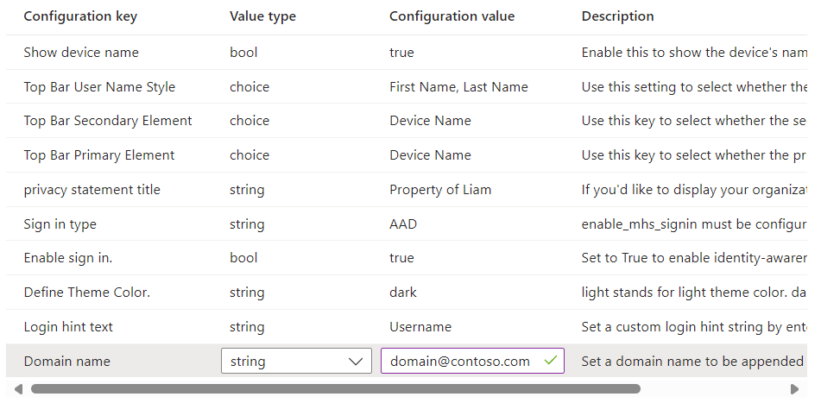
In order to enhance your MHS Sign-in experience you can customise certain settings like Top Bar Username Style, Secondary Element, Custom sign in domain name etc.
In Intune Admin Centre head to Apps > App Configuration Policies > Create > Managed Devices
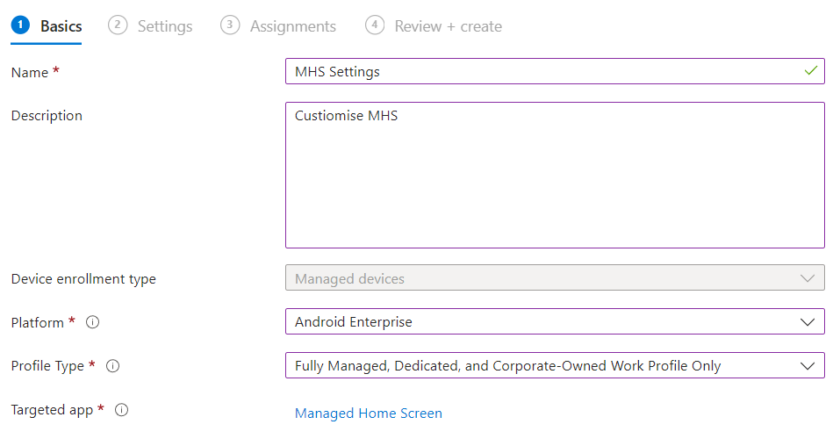
Fill in the basic settings, name/description and choose the Managed Home Screen app
Use the drop down to select ‘Use Configuration Designer‘ and click + Add.
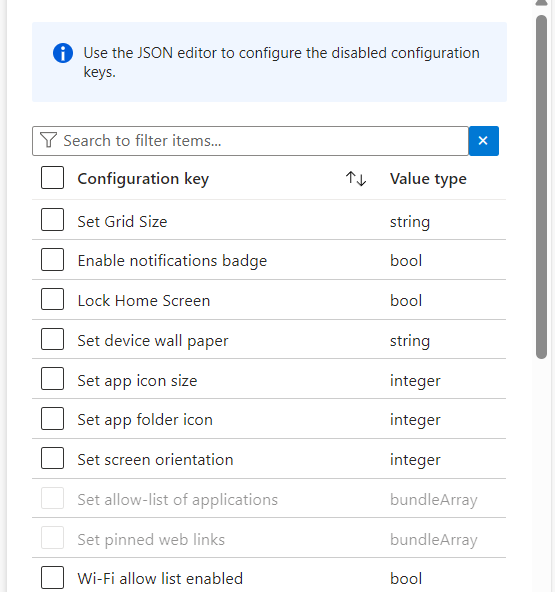
Use the panel to select which settings you’d like to configure.
You can customise this to your liking however I recommend enabling the following
3. Configure Device Permissions
In order to use certain features of Managed Home Screen Sign-in, the app requires a few device permissions.
| Permission |
| Overlay Permission is required by:
– Virtual home button |
| Notification Permission is required by:
– Notification badge |
| Alarms & Reminders permission is required by:
– Screen saver |
| Write Settings permission is required by:
– Brightness toggle |
On first use you may be asked to Grant permissions if you have enabled any of the above, you can do this by following the prompts on screen. If your Managed Home Screen gets stuck in a permissions loop and does not allow you to toggle on certain permissions, simply reboot the device and try again. Some OEMs allow you to set this permissions automatically, including Samsung. If you use Samsung Tablets, use the guide below to configure the permissions automatically. if not, skip this step.
Automatically Configure Managed Home Screen Permissions (Samsung OS 13+)
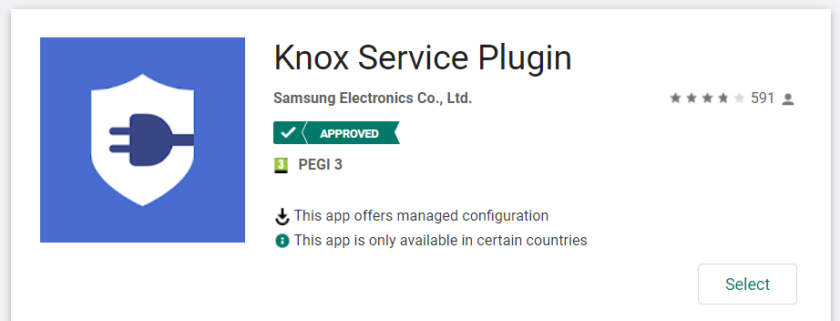
Step 1 – Install the Samsung Knox Service Plugin
Search for and Deploy the Knox Service Plugin on the Managed Google Play Store and deploy this to your device(s).
Step 2 – Configure Plugin
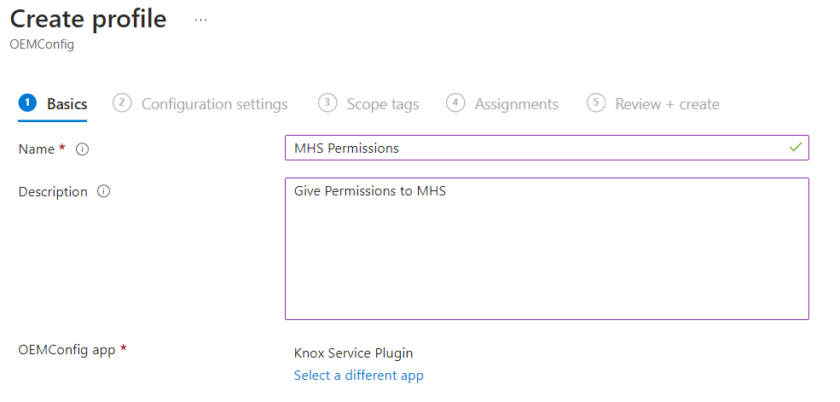
In the Intune Admin Centre head to Devices > Manage devices > Configuration > Create > New policy. Create a new policy with the following details.
- Platform: Select Android Enterprise.
- Profile type: Select OEMConfig.
Fill in the basic details, under OEMConfig app, choose Knox Service Plugin
In Configuration settings, select the Configuration designer.
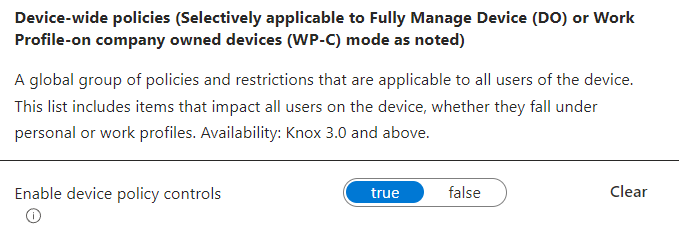
Under Device-Wide Policies, click Configure
Set enable-device policy controls to true
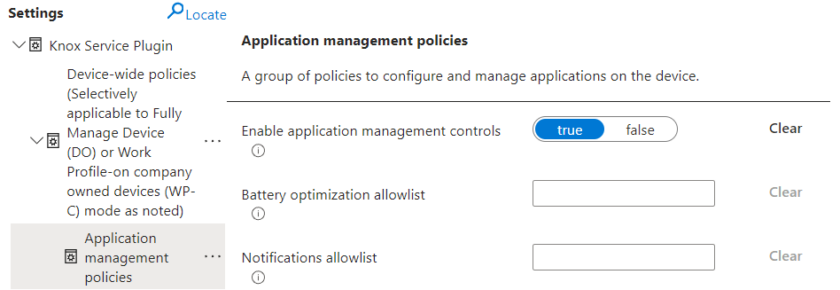
In the same section click Configure under ‘Application Device Management‘
Set Enable Application Management Controls to True.
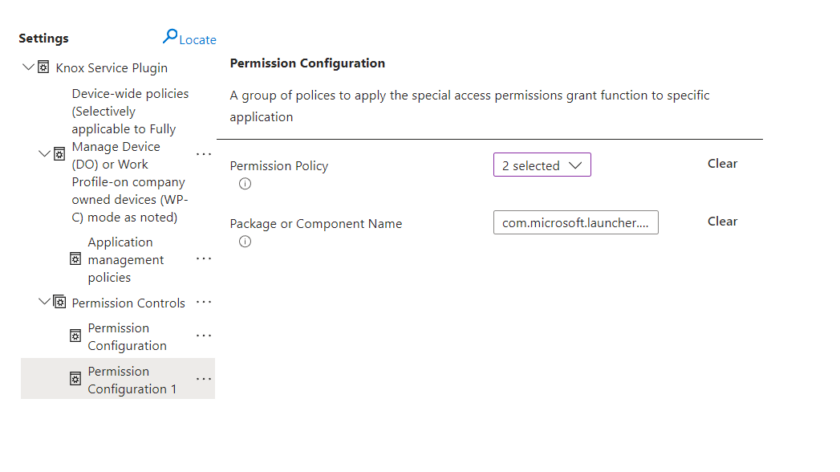
Now head back to the top-level ‘Knox Service Plugin‘ and look for Permission Controls.
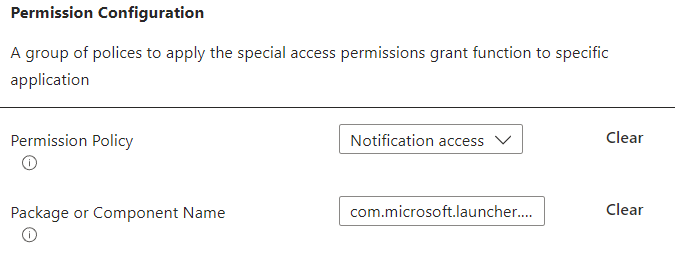
Click the Ellipsis (Three dots icon) and Add Setting.
Select ‘Notification Access’ from the Dropdown and enter com.microsoft.launcher.enterprise/com.microsoft.launcher.next.model.notification.AppNotificationService into the Package or Component Name.
Repeat the above step adding a second setting.
Select Alarms and Reminders and appear on top. Enter com.microsoft.launcher.enterprise into the Package or Component Name.
Deploy the Configuration profile to your selected devices.
The Permissions should now automatically apply. Please note devices on One UI Core do not support permission control
Galaxy Tab A7 (One UI Core), Galaxy Tab A7 Lite (One UI Core), Galaxy Tab A8 (One UI Core)

#EdTech Network Manager, experienced in Microsoft 365, Server 2019, Intune, SCCM and anything inbetween.







Hi Liam,
Thanks for this, do you know how to allow the built in screen recorder to be enabled within Managed Home Screen? I am struggling to enable this!
Thanks liam, would you know if screen capture is a setting within intune that can be enabled or disabled?
Hi Liam,
thank you for the detailed article. The MS documentation (https://learn.microsoft.com/en-us/intune/intune-service/configuration/oemconfig-managed-home-screen-permissions-android?tabs=samsung-app%2Csamsung-policy) states that the package/component for notification permisson should be
com.microsoft.launcher.enterprise/com.microsoft.launcher.homescreen.next.model.notification.AppNotificationService
instead of the value in the article
com.microsoft.launcher.enterprise/com.microsoft.launcher.next.model.notification.AppNotificationService
Thanks for pointing this out, it must have changed recently as it was correct.