Keeping your Microsoft Entra Connect client (formally Azure AD Connect) up to date is crucial for ensuring secure, efficient, and reliable synchronisation between your on-premises Active Directory and Microsoft Entra ID (formerly Azure AD). Each update brings performance improvements, bug fixes, and new features, helping you stay aligned with Microsoft’s evolving cloud ecosystem.
In this article, I’ll walk you through the upgrade process, from preparation and installation to post-update checks, ensuring a smooth, disruption-free transition. Whether you’re maintaining a hybrid environment or enhancing your identity infrastructure, staying updated is key to avoiding issues and unlocking the latest capabilities.
Urgent Updates Required
Given the news from Microsoft that the impending depreciation of MSOnline and AzureAD Powershell on 07/04/2025 will effect older versions of the Entra Sync Client, now is a perfect time to ensure you are up-to-date.
From April 7th, Any Entra Connect Client older than 2.4.18.0 (Released 10/07/2024) will be affected and its expected that;
- All authentication requests to Entra ID on the Connect Sync wizard will fail. Some of the capabilities that will be impacted include schema refresh, configuration of staging mode and user sign-in changes
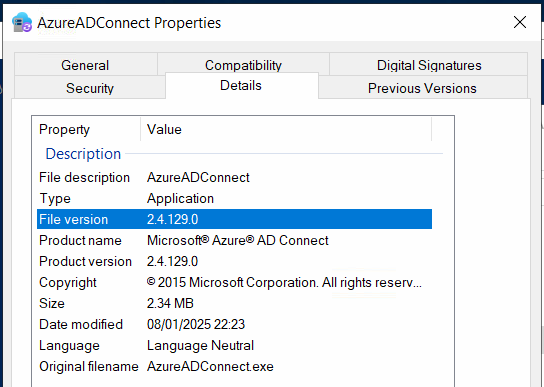
Checking Your Version
To view which version of Entra Connect Sync Client you have, simply head to C:\Program Files\Microsoft Azure Active Directory Connect on your server, and right click AzureADConnect.exe selecting Properties. On the Details tab, look for File Version.
Installing the Latest Version
Download
In order to install the latest version of Entra Connect, first head to the Official Microsoft Download Page and install the download the .MSI for the latest version.
Copy this .MSI to your server(s) which currently host the Entra /Azure AD Connect Client.
Prerequisites
If you are upgrading from an older version, you may need to ensure TLS 1.2 is enabled on our server before upgrading. Follow this guidance from Microsoft here.
Install
Before you begin, I recommend ensuring you have a valid backup of the server where Connect Client is installed, in case any issues arise.
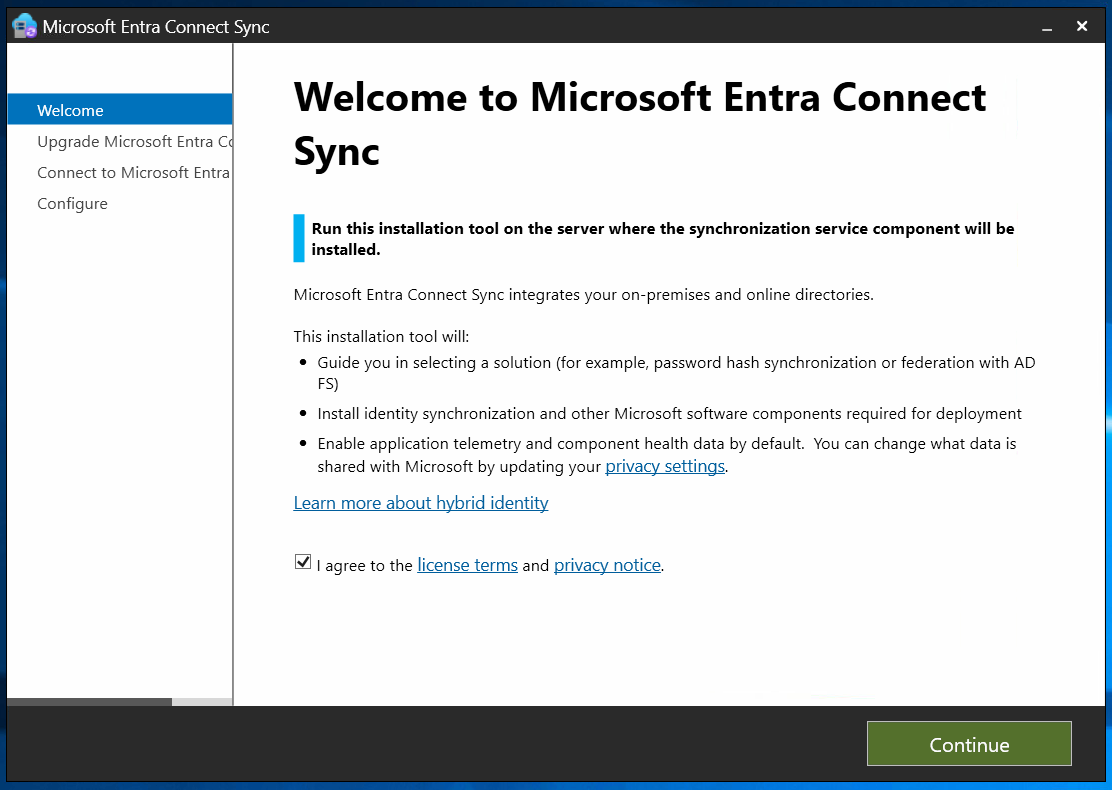
On your server, launch the AzureADConnect.MSI file and follow the setup wizard.
Once complete, the sync client will launch and you’ll see the welcome screen. View the Terms and Privacy notice and press Continue.
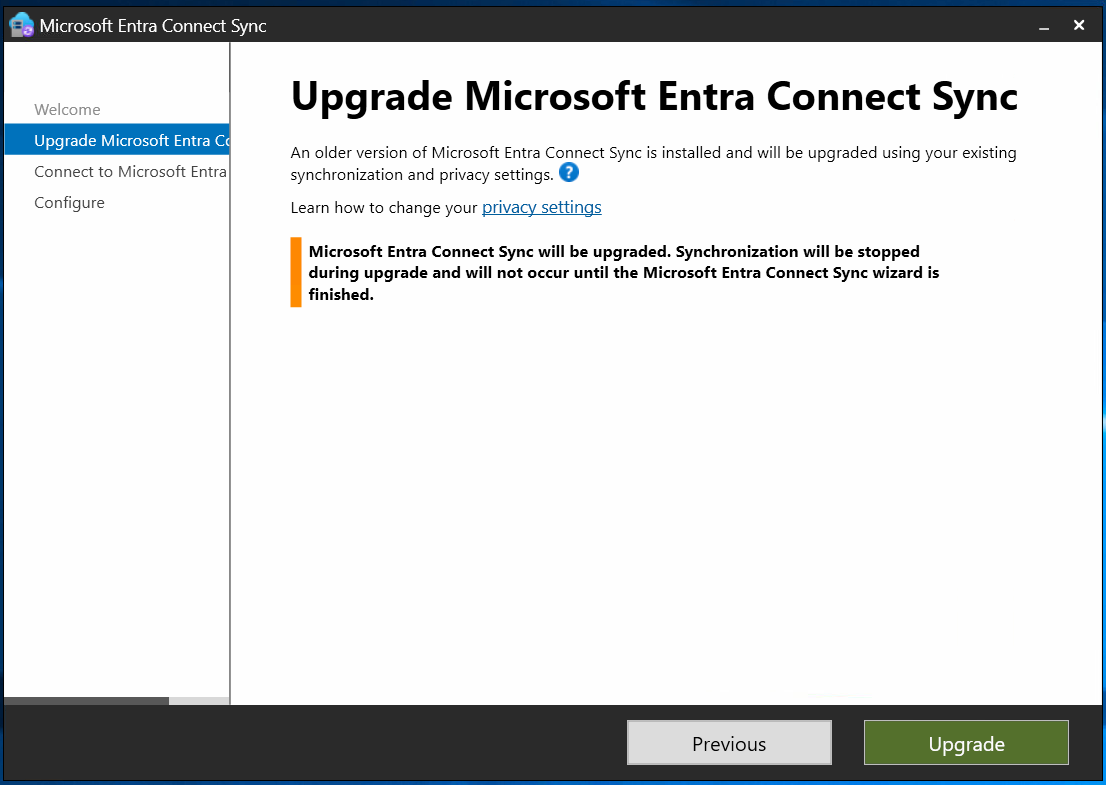
You will now be prompted to update the Entra Connect Sync Client, this will temporarily pause the synchronisation service while it upgrades. Click Upgrade.
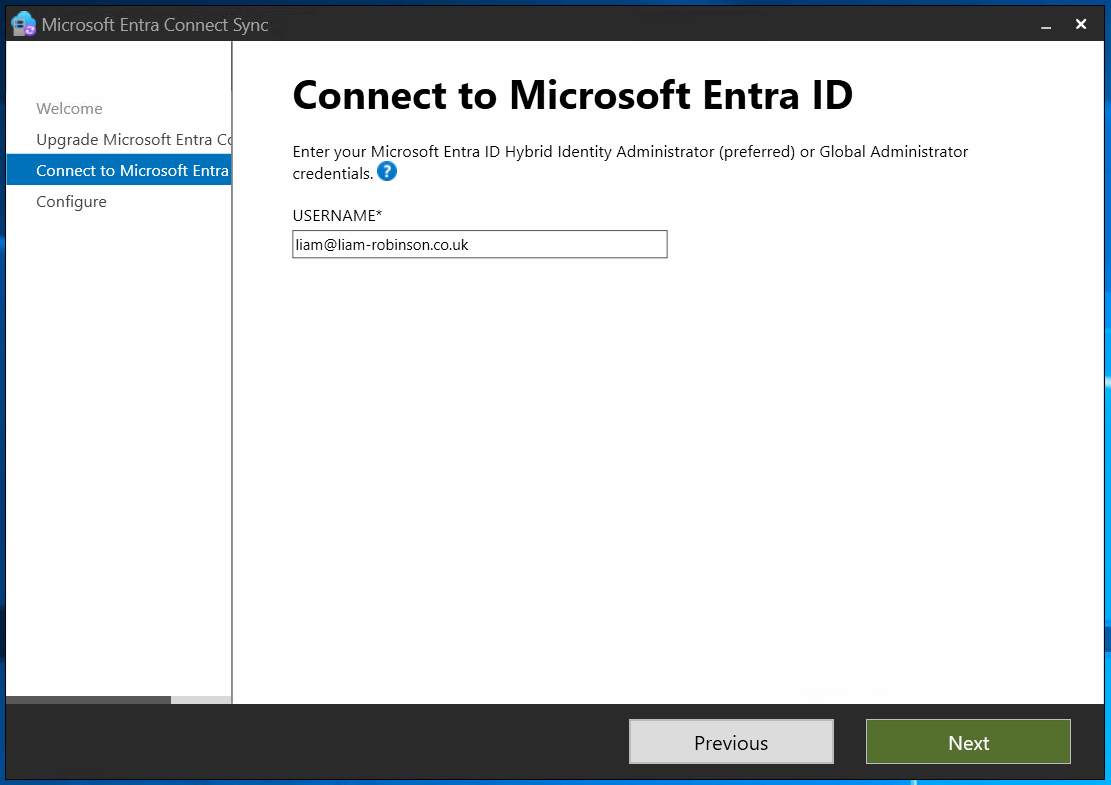
You’ll now need to enter the credentials of a Global Administrator or Hybrid Identity Administrator on your M365 tenant.
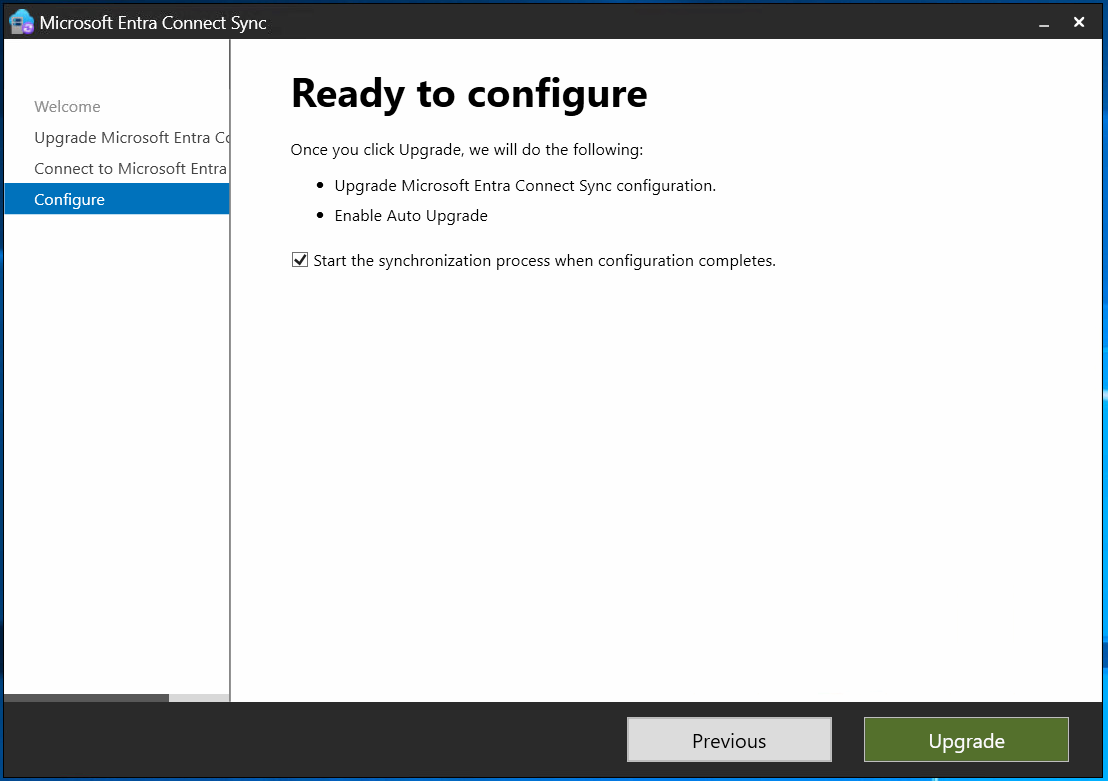
Once it has successfully connected to your tenant, you will be asked to confirm and enable auto upgrade. Ensure “Start the synchronisation process when config completes” is ticked, unless you have already enabled your failover client, then you should leave it unticked and put the other in staging mode before starting the sync process.
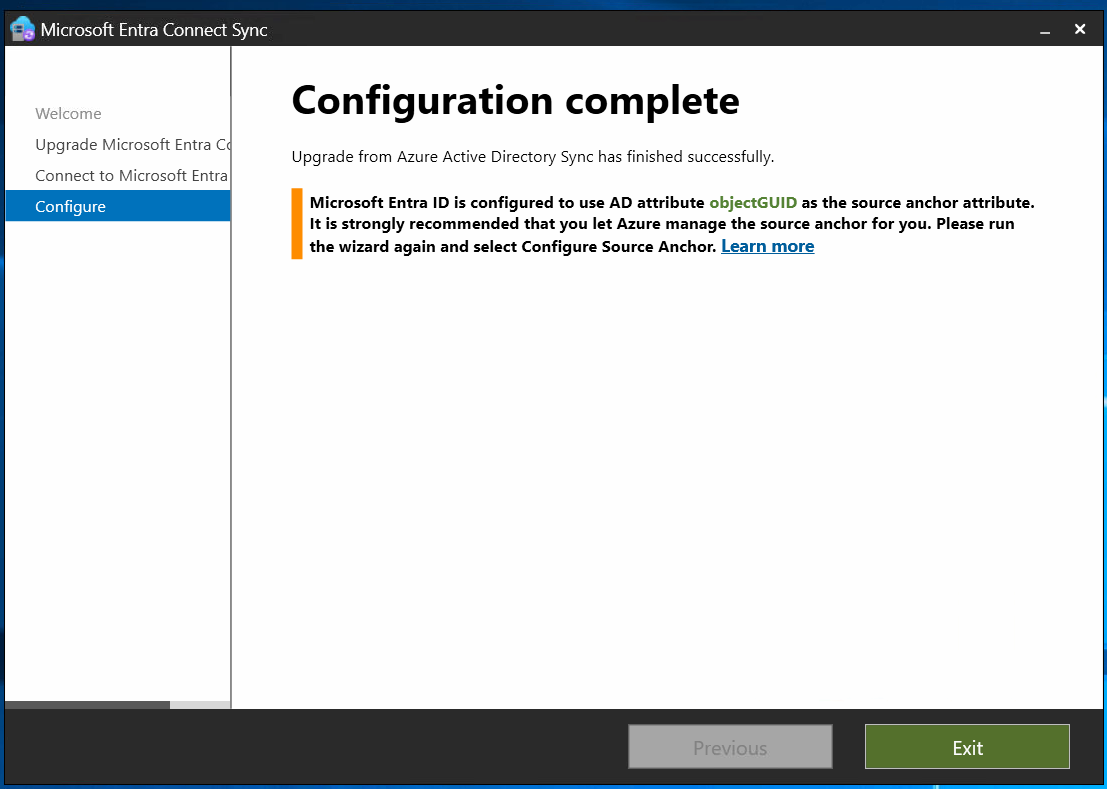
Once Completed you will receive confirmation.
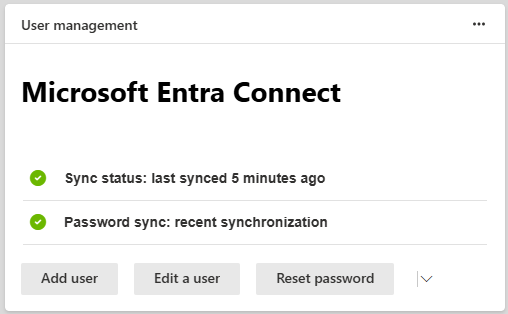
Verify Sync is still working after upgrade
Visit your tenant and ensure Synchronisation Status appears healthy. I recommend checking this every hour to ensure its stays healthy. The Sync Status should normally update every 30 minutes or so. If the sync status does not update within an hour, there may be issues with the connector.
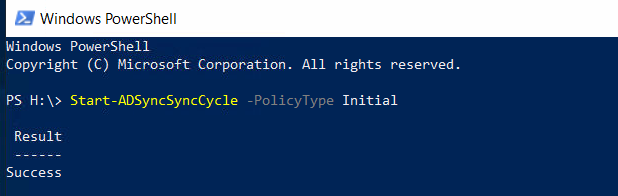
Force a Sync
You can force a sync by opening powershell on the server where your Entra Connect client is installed and running the following CMDlet.
Start-ADSyncSyncCycle -PolicyType InitialIf successful, you should see a success message.
If not, Verify sync logs in Event Viewer (Application and Services Logs > Microsoft > AzureADConnect)
Migrating to Cloud Sync
It’s highly likely that the Entra Connect Sync Client will be depreciated in the not so distant future, in favour of Entra Cloud Sync which we will cover at a later date.

#EdTech Network Manager, experienced in Microsoft 365, Server 2019, Intune, SCCM and anything inbetween.