As the festive season approaches, schools and businesses alike often close or operate with reduced staffing. Setting out-of-office replies during this period is a simple yet effective way to manage expectations, maintain professional communication, and ensure compliance with GDPR requirements, particularly regarding Subject Access Requests (SARs).
By informing senders of office closures, organisations can reduce frustration, protect staff wellbeing, and avoid potential legal risks. Common practice amongst most schools and organisations is to list their holiday dates and provide a pre-determined response along with dedicated DPO (Data Protection Office) email should any SARs come in while staff are enjoying well earned down time.
You can instruct staff on how, what and when to set an out of office reply, but you can guarantee at least one or two staff will fail to do so before you break up for the holidays. To combat this I will show you how you can automatically set Out Of Office (Automatic Replies) to all users in your organisation using Microsoft 365 and PowerShell.
I have provide two separate ways below on how to set automatic replies for all users depending on your requirements.
Setting the same Automatic Reply For All Users
This section shows you how to set the same message, start and end date for all users.
1. Prepare Your CSV File
Create a CSV file Emails.csv with just one column containing all your users email addresses (You can export from AD or SIMS)
UserPrincipalName
user1@yourdomain.com
user2@yourdomain.com
user3@yourdomain.com
Save your CSV file somewhere easily accessible.
2. Import/Install Exchange Online Module
You now need to install and/or import the EOL Module
Install-Module -Name ExchangeOnlineManagement
Import-Module ExchangeOnlineManagement
3. Connect to Exchange Online
Connect-ExchangeOnline -UserPrincipalName <your_admin@domain.com>Replace <your_admin@domain.com> with your actual email (must have permissions).
4. Set Out Of Office (Automatic Replies)
Modify the script below to edit your preferred internal/external Automatic Replies and your preferred start and end times. Ensure you set the correct path to the CSV file you created in Step 1.
Import your CSV File containing your Users UPNs
# Import CSV file containing user email addresses
$users = Import-Csv -Path "C:\Path\To\Emails.csv"
Define your options (date/time/messages)
# Define Out of Office settings
$InternalMessage = "School is currently closed until the 7th January 2025, I will respond on our return"
$ExternalMessage = "School is currently closed until the 7th January 2025, I will respond to your email after this date. If your email relates to GDPR, or SARs specifically please email DPO@YOURDOMAIN.com for a response within 72 hours."
$StartDate = "2024-12-19 12:30PM"
$EndDate = "2025-01-07 07:00AM"
Apply Out Of Office to all users
# Loop through each user to set Automatic Replies
foreach ($user in $users) {
    Write-Host "Setting Out of Office for: $($user.UserPrincipalName)"

    Set-MailboxAutoReplyConfiguration -Identity $user.UserPrincipalName `
        -AutoReplyState Scheduled `
        -StartTime $StartDate `
        -EndTime $EndDate `
        -InternalMessage $InternalMessage `
        -ExternalMessage $ExternalMessage `
        -ExternalAudience All

    Write-Host "Out of Office configured for: $($user.UserPrincipalName)"
}
Verify Out Of Office has applied
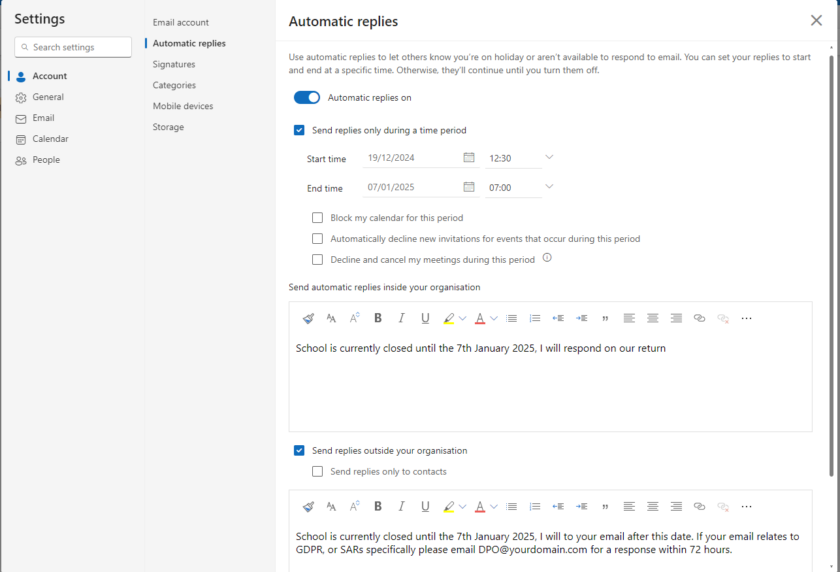
You can verify the out of office has applied by opening one of your users mailboxes and heading to the Automatic Replies section in Settings.
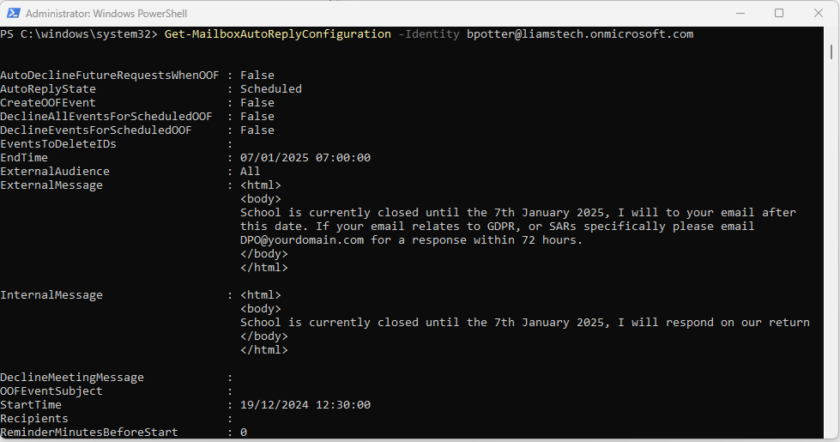
If you do not have permission for this, or do not want to, you can also check it has applied using the CMDlet below.
Get-MailboxAutoReplyConfiguration -Identity user1@domain.comSetting different Automatic Replies For Different users
This section shows you how to set different messages, start and end dates for different users. For example one message for staff, one message for students.
The process is generally the same however Steps 1 and 4 are slightly different.
1. Prepare Your CSV File
Create a CSV file Emails.csv with multiple columns containing the headers, UserPrincipalName, InternalMessage, ExternalMessage, StartDate,EndDate.
Populate the CSV files with your required users (UPNs) and custom messages depending
2. Import/Install Exchange Online Module
You now need to install and/or import the EOL Module
Install-Module -Name ExchangeOnlineManagement
Import-Module ExchangeOnlineManagement
3. Connect to Exchange Online
Connect-ExchangeOnline -UserPrincipalName <your_admin@domain.com>Replace <your_admin@domain.com> with your actual email (must have permissions).
4. Set Out Of Office (Automatic Replies)
# Import CSV file
$users = Import-Csv -Path "C:\Path\To\Emails.csv"
# Loop through each user to set Automatic Replies
foreach ($user in $users) {
Write-Host "Setting Out of Office for: $($user.UserPrincipalName)"
Set-MailboxAutoReplyConfiguration -Identity $user.UserPrincipalName `
-AutoReplyState Scheduled `
-StartTime $user.StartDate `
-EndTime $user.EndDate `
-InternalMessage $user.InternalMessage `
-ExternalMessage $user.ExternalMessage `
-ExternalAudience All
Write-Host "Out of Office configured for: $($user.UserPrincipalName)"
}
#EdTech Network Manager, experienced in Microsoft 365, Server 2019, Intune, SCCM and anything inbetween.


